by Baxter

The dynamic sequence of Cat-Cow is a familiar feature in most modern yoga classes. However, this is certainly not an ancient yoga pose, and most likely made its way into our present practice from the world of physical therapy, where it is often used to address low back pain. In fact, I have found it so useful for my weekly crew of back-challenged yogis that it shows up just about every week in our class. What is so great about Dynamic Cat-Cow is that it not only is an excellent way to move your spine through a pretty full range of the motions of gentle forward bending and back bending, known as flexion and extension respectively, but you also start connecting movement with breath. That connection is helpful both for cultivating present moment awareness and for cultivating an aspect of agility.
Dynamic Cat-Cow is also a good transition pose. You can use to it transition from seated poses—like your initial sitting meditation—down to reclining poses. And you can use after a series of reclining poses as a transition to sitting or standing poses. Cat-Cow also requires a bit of arm and upper back strength to do properly, so is an upper body strengthening pose. And since you are bearing weight on your hands, it builds wrist bone strength, which could be helpful for folks with osteoporosis, as the wrist is the second most commonly fractured area for people with OP.
I prescribe this for:
- general spinal stiffness
- low back pain
- upper body weakness
- osteoporosis and osteopenia
- arthritis or stiffness of the hips
- arthritis of the spine
- held tension anywhere from hips to neck
- improving breath capacity
- beginner’s experience of pranayama
- general stress reliever
- warming up for any other physical activity
- part of any gentle practice
Nina recommends this pose for depression, lethargy or for times when you just don’t feel like practicing. Moving with your breath can help perk you up, and if you’re not up to doing standing poses (such moving dynamically from Mountain pose into Arms Overhead pose), kneeling on the floor can feel more accessible. You’ll often find that six or so rounds of Cat-Cow will energize you enough to move onto Downward-Facing Dog and from there into a full practice.
Cautions: While this pose is generally well tolerated by most practitioners, it can be challenging for people with certain physical problems. People with wrist pain issues may have to modify the pose by doing it on fists, fingertips, or forearms. Those with knee pain may have to use extra blankets to pad your knees or do the seated or standing versions. Those with active spinal pain in the lower back or neck may have keep the range of motion more moderate as you assess how your body responds to the movement
Classic Version
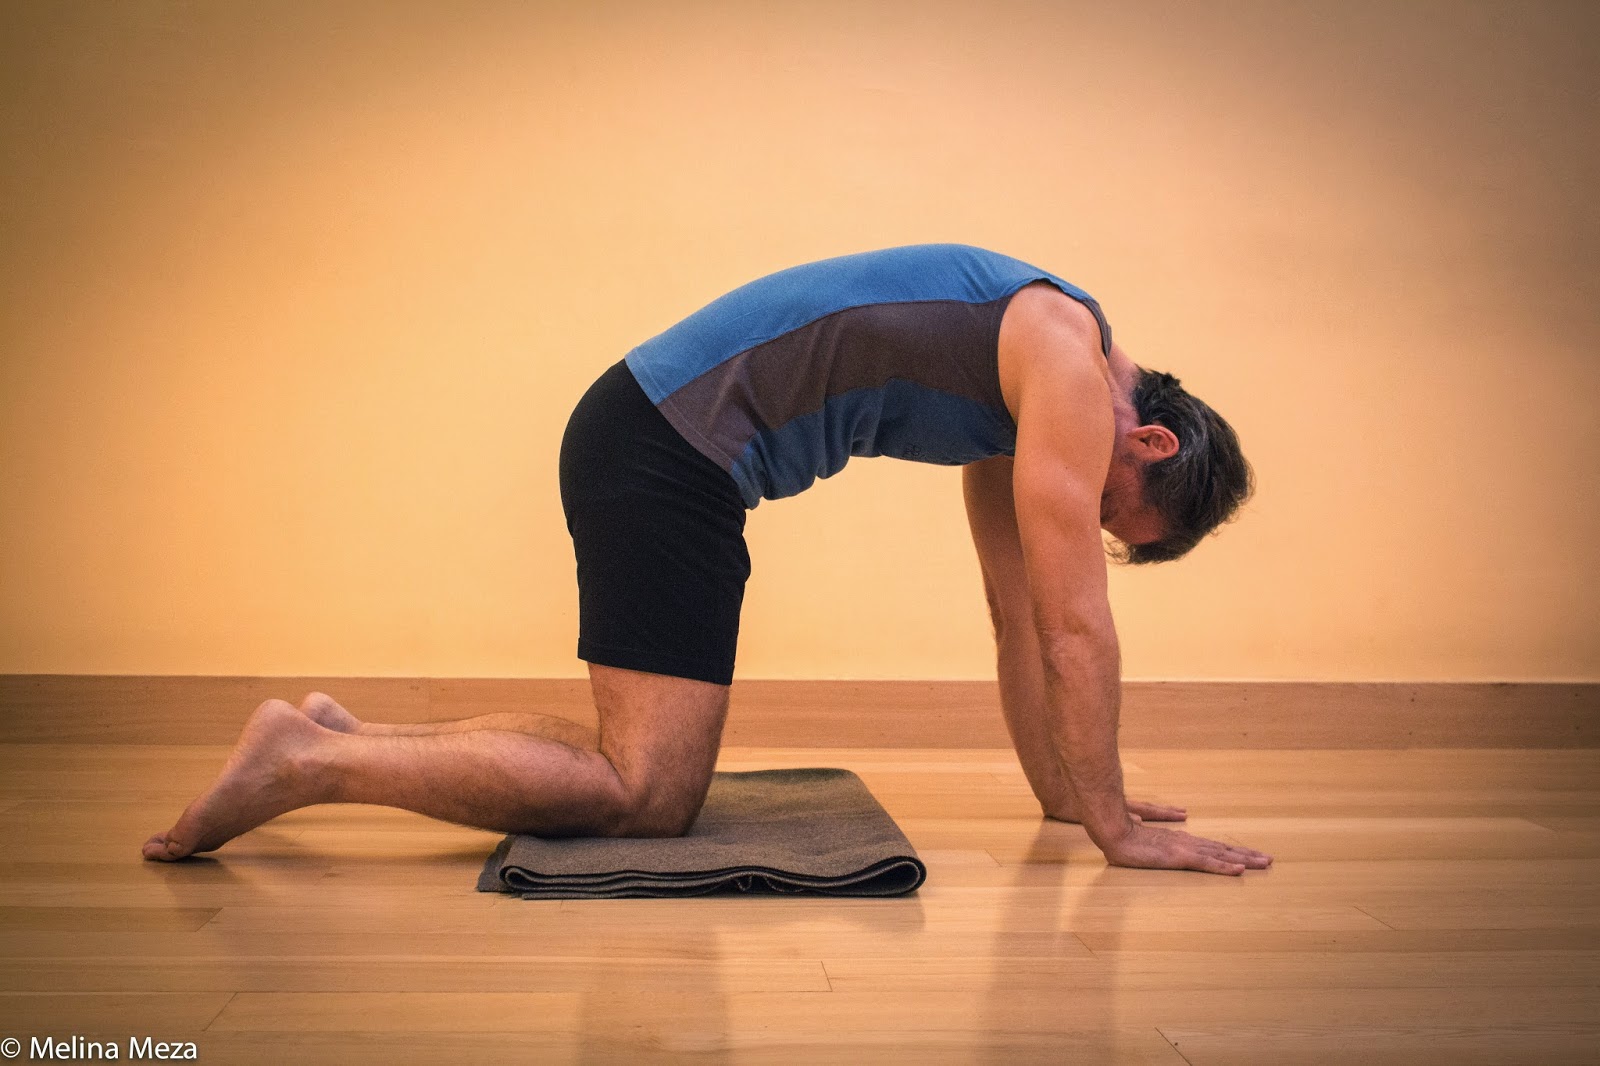
1. Start in Hands and Knees position. I recommend using at least one blanket under your knees, as over time the patella of your knees can be very sensitive to pressure. Position your hips directly over your knees and your shoulders directly over your wrist joints, and bring your spine and head into a more neutral alignment, fairly parallel with the floor. Keep your elbows straight at all times, and press evenly with the palm of your hands into the floor.

2. As you take an inhalation, begin to arch your spine into a gentle backbend (the Cow position of Cat-Cow—I like to imagine I’m a Happy California Cow!), allowing the arch to travel from your tailbone all the way to the crown of your head. Allow your sitting bones and tailbone to lift up, your mid-spine and belly to drop down a bit and your chest and head to turn forward. With practice you’ll become more efficient in completing this series of movements on a comfortable inhalation. ()

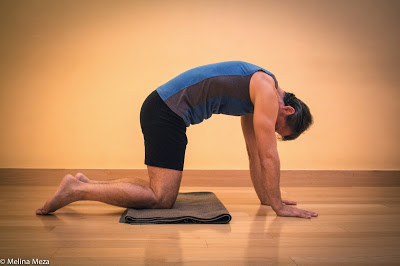
3. On your next exhalation, begin to dome your spine in the opposite direction (the Cat position of Cat-Cow—I imagine I am an angry cat on Halloween!). Allow your pelvis to tip backwards, with your tailbone and sitting bones turning towards the floor, your mid-spine to round towards the sky, and your neck and head to release down so you can look back at your knees. Push strongly into the floor with your arms. With practice you’ll become more efficient in completing this series of movements on a comfortable exhalation.

4. Move back and forth with your breath between these two shapes for at least six rounds of breath, and more if you are so inclined.
After coming out of the pose, I always recommend you shake out your wrists and hands to release and stress or tension in those areas, before moving on to other poses.
First Variation: Seated Cat-Cow
This is a great alternative for anyone how has trouble getting down onto hands and knees, or as an office alternative when you would not want to be down on your hands and knees! Of course, unlike classic Cat-Cow, you won’t get the arm, upper body, or wrist strengthening benefits.
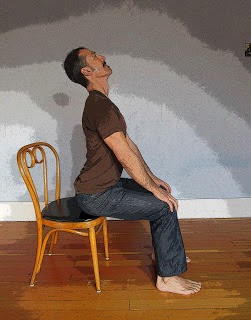
1. Start by sitting near the front of the chair seat, with your feet hip-distance apart and planted firmly under your knees. Straighten your arms, and place your hands on or near your knees. Before moving into the pose, establish the lift of your spine, from your sitting bones through the crown of your head.

2. On an inhalation, start moving from your pelvis, rocking your hips forward so your weight comes more onto the front edge of your sitting bones. As you continue to inhale, gently lift your spine and lengthen into gentle backbend. Lift your breastbone forward and up and allow your head and neck to lengthen up and back. This is the Cow equivalent of Cat-Cow.

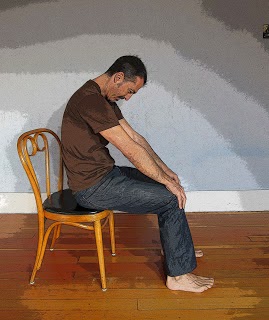
3. On your next exhalation, start moving from your pelvis, rolling your pelvis in the opposite direction, moving the back of your waist backward and rocking onto the back part of your sitting bones. As you continue to exhale, allow your middle back to move back as well and drop your chin toward your chest. This is the Cat equivalent of Cat Cow.

4. Repeat these movements for at least six rounds of breath. After you finish, you may want to stand up for a moment to stretch your legs out.
Second Variation: Standing Cat-Cow
The standing version of Cat-Cow is a good counter-pose to release any tension in your spine and neck after practicing long holds of standing poses. Of course, as with seated Cat-Cow, you won’t get the arm, upper body, or wrist strengthening benefits.
1. Start by standing in Mountain Pose. Then bend your knees slightly while keeping your spine upright and place your hands on the fronts of your thighs.
2. On an inhalation, tip your pelvis forward over your thighbones, gently arch your spine into a backbend while turning your chest up and lifting your chin to take your head slightly back. Keep the back of your neck feeling long to protect your neck. This is the Cow equivalent of Cat-Cow.
3. On your next exhalation, tip your pelvis baclin the opposite direction, rolling it back over your thighbones so your sitting bones and tailbone turn down toward your heels. Allow your spine to rounds backward and your head and neck drop gently towards your chest. This it the Cat equivalent of Cat-Cow.
4. Repeat for at least six rounds of breath, and then return to Mountain pose.
Third Variation: Reclined Cat-Cow
This version is for people who cannot bear weight safely on thier hands or knees, or in those who are severely fatigued. It does not work your arms as the classic Cat-Cow does, nor does your neck area move, but your spine does get to flex and extend. I usually refer to this variation as “Pelvic Rock and Roll.”
1. Start by lying on your back with your knees bent, your feet on the floor about a foot from your hips and hip-distance apart, and arms relaxed at your sides.
2. On an inhalation, rock your pelvis towards your heels, allowing your lower back to arch away from the floor. This is the Cow equivalent of Cat-Cow.
3. On your next exhalation, roll your pelvis back towards your shoulders, allowing your lower back to come gently down to the floor and turning your tailbone and sitting bones up towards the ceiling. This is the Cat equivalent of Cat-Cow. Be careful not to launch up into Bridge pose—your hips remain on the floor in this pose.
4. Repeat for at lease 6 rounds of breath.
When you have finished, stretch your legs out long on the floor to release any tightness in your front hip joints.
Follow Yoga for Healthy Aging on Facebook ° To order Yoga for Healthy Aging: A Guide to Lifelong Well-Being, go to Amazon, Shambhala, Indie Bound or your local bookstore.


Leave A Comment